Tuesday, July 31, 2012

Photo a Day Challenge ~ August

Come join the fun, it's time for another month of photo a day challenge!   

I must admit, I failed to participate for the month of July, but can't wait to start it up again!   If you missed my post about this awesome challenge,  you can catch up HERE.   Excited to see what photos you capture for August!  Cheers!

You can follow me here:  
Instagram (@lapetitevie)  ~  Facebook  ~  Pinterest  ~  Twitter (@lapetitevieblog)


Friday, July 27, 2012

Let the Games Begin!


We are so very excited for the 2012 Olympic games in London!


This year, we are especially excited about watching someone we actually know, Tugce Canitez from Turkey!  She is a ridiculously amazing basketball player (Golden State Athletic Conference player of the year, an NAIA First Team All-American and the State Farm Women’s Basketball Coaches Association NAIA Player of the Year) that we were lucky enough to watch as she played on the Westmont Women's basketball team alongside my sister, Katie.  We are so proud of Tugce and beyond thrilled to cheer her on as she represents her home country Turkey in this memorable experience. 

Here is Tugce's schedule if you would like to follow along!

July 28:      Turkey plays against Angola @ 6:30 a.m. (PDT)
July 30:      Turkey plays against Czech Republic @ 3:15 a.m
August 1:    Turkey plays against United States @ 2:15 p.m.
August 3:   Turkey plays against China @ 8:45 a.m.
August 5:   Turkey plays against Croatia @ 12:00 p.m.

Cheers & Happy Weekend!!!


Wednesday, July 25, 2012

Summer Panzanella

We are so excited about our first garden tomatoes of the summer, they amazingly sweet and bursting with so much flavor...


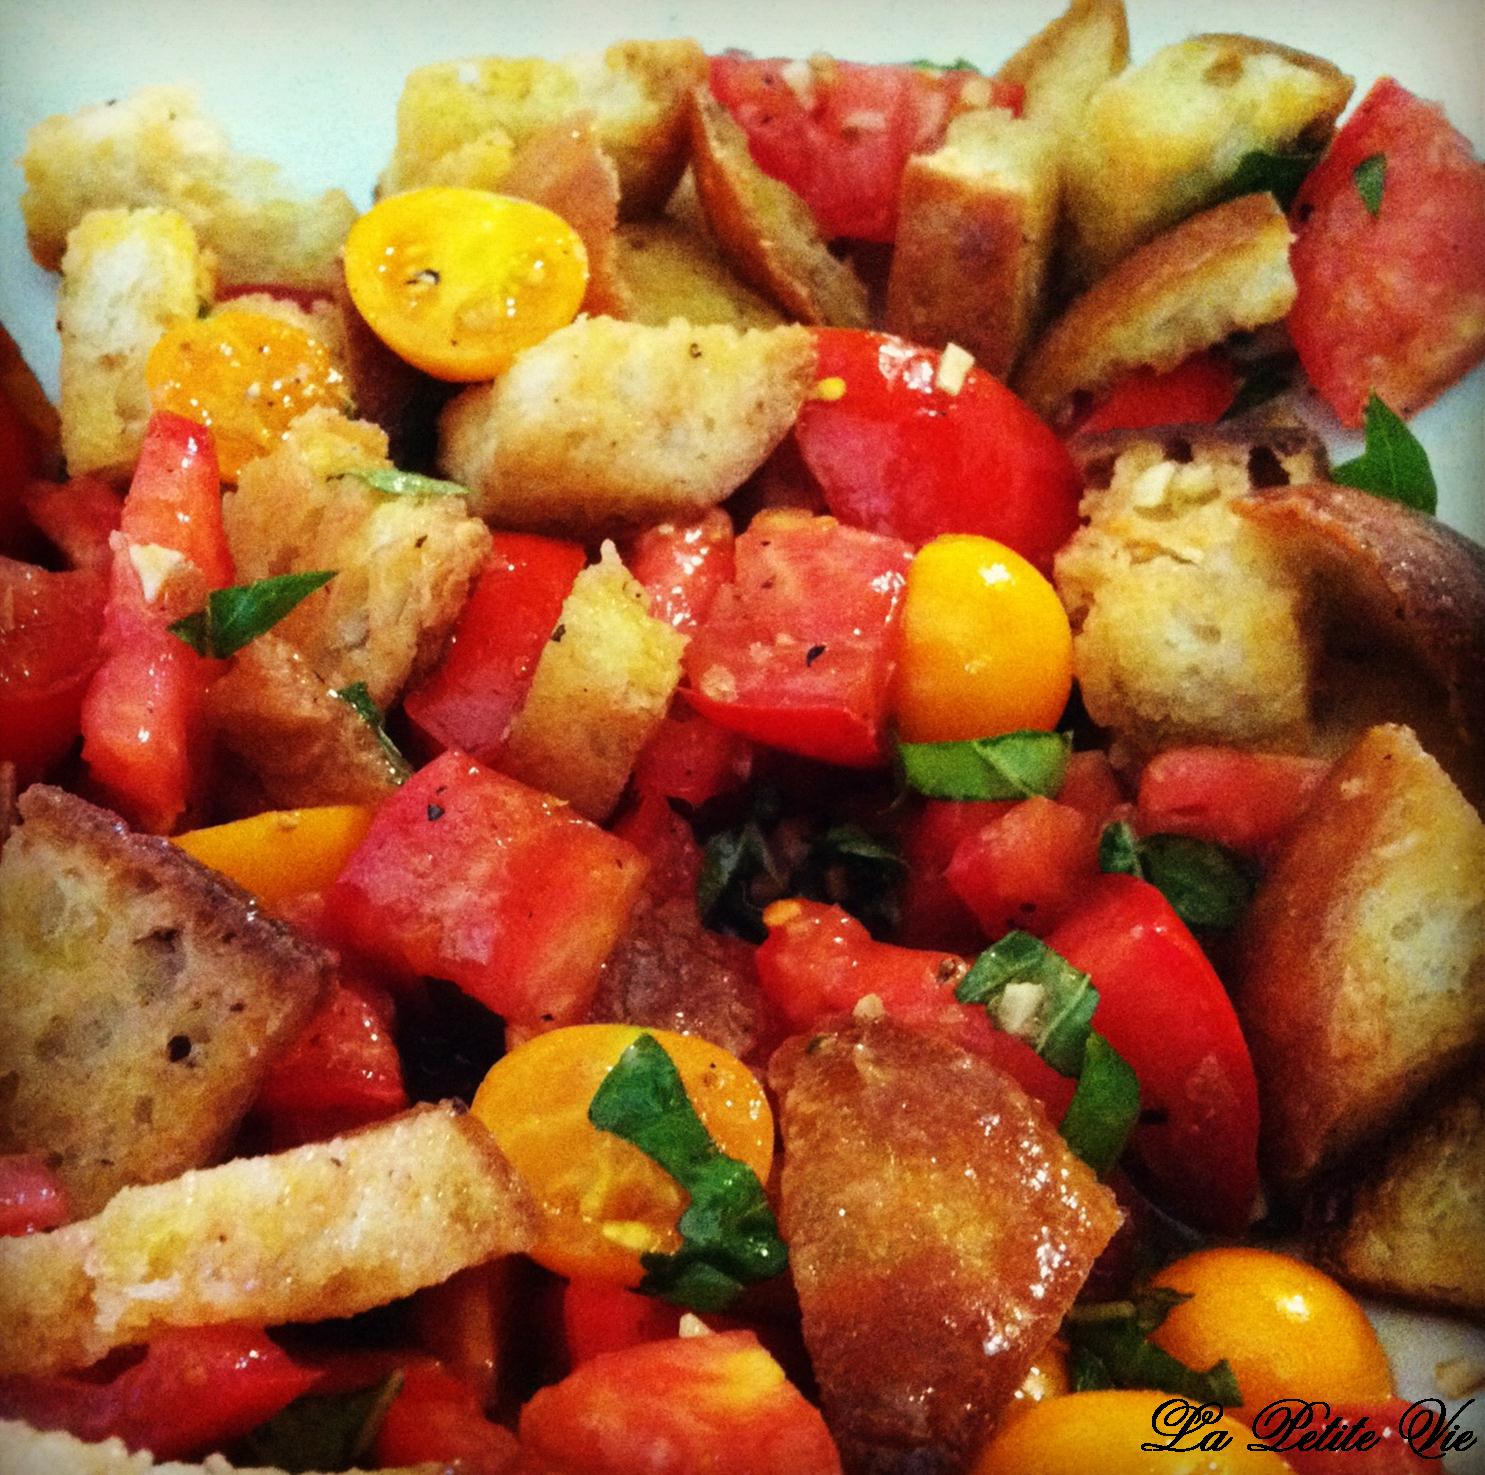
This past weekend my husband and I indulged in one of our favorite salads, panzanella!  It's the perfect blend of crunchy bread, mild hints of garlic and lots of fresh tomato and basil goodness!  Bon Appetit!


 Tuscan Bread & Tomato Salad ~ Panzanella
 serves: 4

Ingredients:
7 tablespoons extra-virgin olive oil
2 tablespoons butter
2-3 cloves garlic, peeled and coarsely chopped
1 12-inch baguette
2 tablespoons balsamic vinegar
2 tablespoons kosher or sea salt
1/4 teaspoon coarsely ground black pepper
8 very ripe assorted tomatoes (3lb.), large ones chopped
1/2 cup basil leaves, torn into pieces or cute into ribbons

Directions:
Preheat oven to 350 degrees.  In a small pan over medium heat, combine 2 tablespoons olive oil, the butter, and garlic; stir until butter melts, about 2 minutes.

Cut baquette into 1/2-inch cubes and put in a 10x15-inch baking pan.  Pour oil mixture over bread and mix well.  Bake until golden, about 10-15 minutes.  Remove from oven and let bread cool in pan.

In a bowl, mix remaining olive oil, vinegar, salt and pepper.  Stir in tomatoes, basil and bread cubes.  Serve at room temperature in shallow bowls, garnish with extra basil.


Pin It

Wednesday, July 18, 2012

DIY ~ Envelope Liners

I have a slight obsession with stationary, just love it all!  It's so bad, that I'm pretty sure I have been hoarding collecting cards and stickers since grade school that I purchased from our local drug store, and still have not used them, ahhh!  So the obsession continues....I am loving envelope liners, I had no idea how easy it was to glam up a plain white envelope!


Supplies:
  • Envelopes
  • Fun paper (scrapbook paper, gift wrap, magazine cut-outs, anything that catches your eye)
  • Pencil
  • Paper cutter/ruler & Xacto Knife
  • Double-sided tape


Assemble:
  • Once you have cut/trimmed up your paper to fit the inside of the envelope (be sure not to cover the seal along the top edge of your envelope, your liner should stop short of the gummed edge once you stuff your liners in each envelope) open your envelope flap and apply a a strip of double-sided tape just under the sealer on the top edge of the flap. 
  • Carefully slide the liner inside the envelope to rest at the bottom.
  • Lightly press down around edges to ensure the liner sticks to the envelope.
  • Fold the flap down and press to crease liner.


Pin It


Linking to:

Monday, July 9, 2012

Chocolate & Cheese Danish

Good Morning!

I can't get over how easy these super chocolatey and perfectly flaky danishes are to make.  They seriously only take a few minutes to put together and taste just like they came from the bakery!  Perfect lil morning treat with coffee, enjoy!


Chocolate & Cheese Danish
adapted from:  Giada at Home

Ingredients:
1/4 cup (2 ounces) cream cheese, at room temperature
1/4 cup (2 ounces) mascarpone cheese, at room temperature
1 egg yolk
1 tablespoon all-purpose flour
3 tablespoons sugar
1/2 teaspoon pure vanilla extract
1/8 teaspoon fine sea salt
1/2 cup mini chocolate chips
2 (9-inch-square) sheets frozen puff pastry, thawed
1 egg, beaten

Directions:
Put an oven rack in the center of the oven. Preheat the oven to 400 degrees F. Line 2 baking sheets with parchment paper. Set aside.

Filling: In a small bowl, mix together the cheeses, egg yolk, flour, sugar, vanilla and salt until smooth. Fold in the chocolate chips. Set aside.

Cut each sheet of pastry into 4 equal-sized squares. Put 4 pastry squares on each prepared baking sheet. Spoon about 2 to 3 teaspoons of the filling into the center of each piece of pastry. Fold 1 corner of the pastry diagonally over the filling to within 1-inch of the opposite corner. Using a pastry brush, brush the folded-over section lightly with the beaten egg. Fold the opposite corner over the egg-brushed pastry to form an open-ended Danish.

Brush the pastry with beaten egg and bake until puffed and golden, about 15 minutes. Remove from the oven and cool for 5 minutes before serving.


Pin It


Linking to:
504 Main